
The Grandest Tour
“Walt Grace’s Submarine Test, January 1967” – John Mayer, 2012
*provided by my father, pre-Walie era
This draft has been sitting in my folder for some time now, but it’s another thing I get asked a lot regarding my trip. So without further ado, here is a snapshot of the making of Walie.
Choosing the Van
When this adventure started in 2020, I was like everyone else during quarantine–mesmerized by the large campers and sprinter vans on TikTok, built with what seemed like infinite space and budget in mind.
My dream rig was a high-top conversion van–a bit smaller and a bit older than a sprinter. It’s large enough that you can stand up in it but small enough to match a studio in NYC (or, so I’ve heard). While that’s still an ideal scenario of mine, Walie is a bit different.
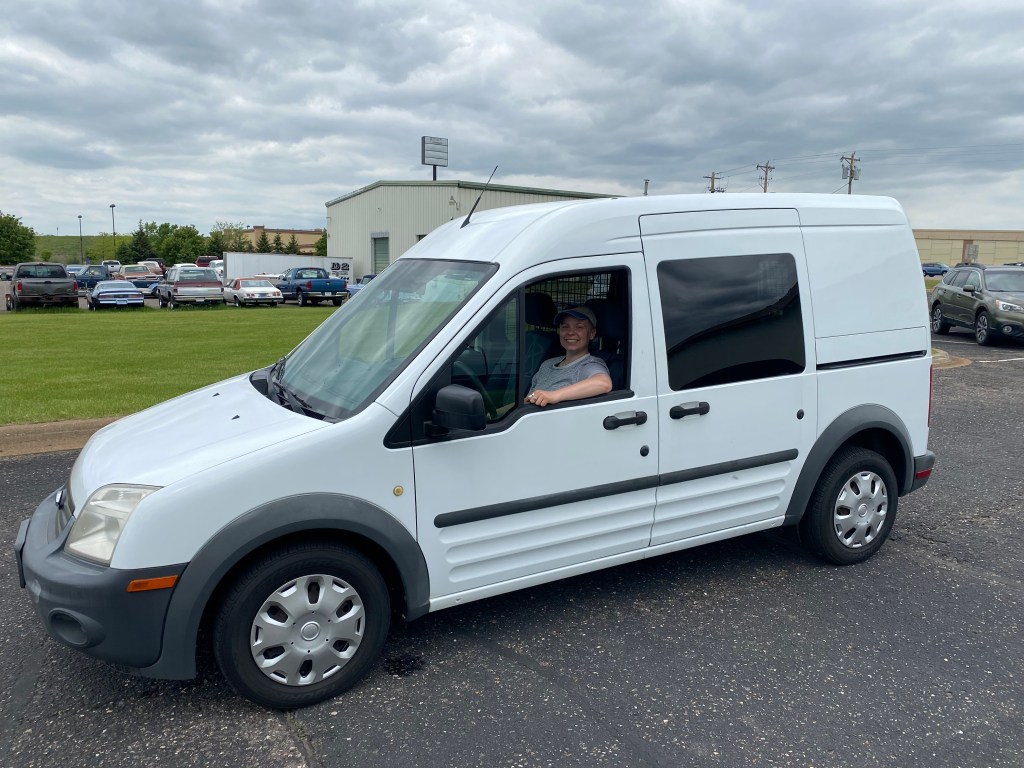
With the world in political turmoil, gas and used car prices rose. It didn’t make much sense to get an older vehicle that guzzled gas. My dad and I talked about alternatives, and he suggested the Ford Transit Connect. A smaller cousin to the Ford Transit, it had gas mileage unrivaled by other vans and felt like driving a regular car.
After a practice road trip in April, I realized I could forfeit the space I thought I needed. I took my family’s Honda Pilot to The Badlands for a little over a week and decided to look at a smaller vehicle. Thus, the idea of Walie changed to a 2012 Ford Transit Connect.
Sacrificing Basic Necessities
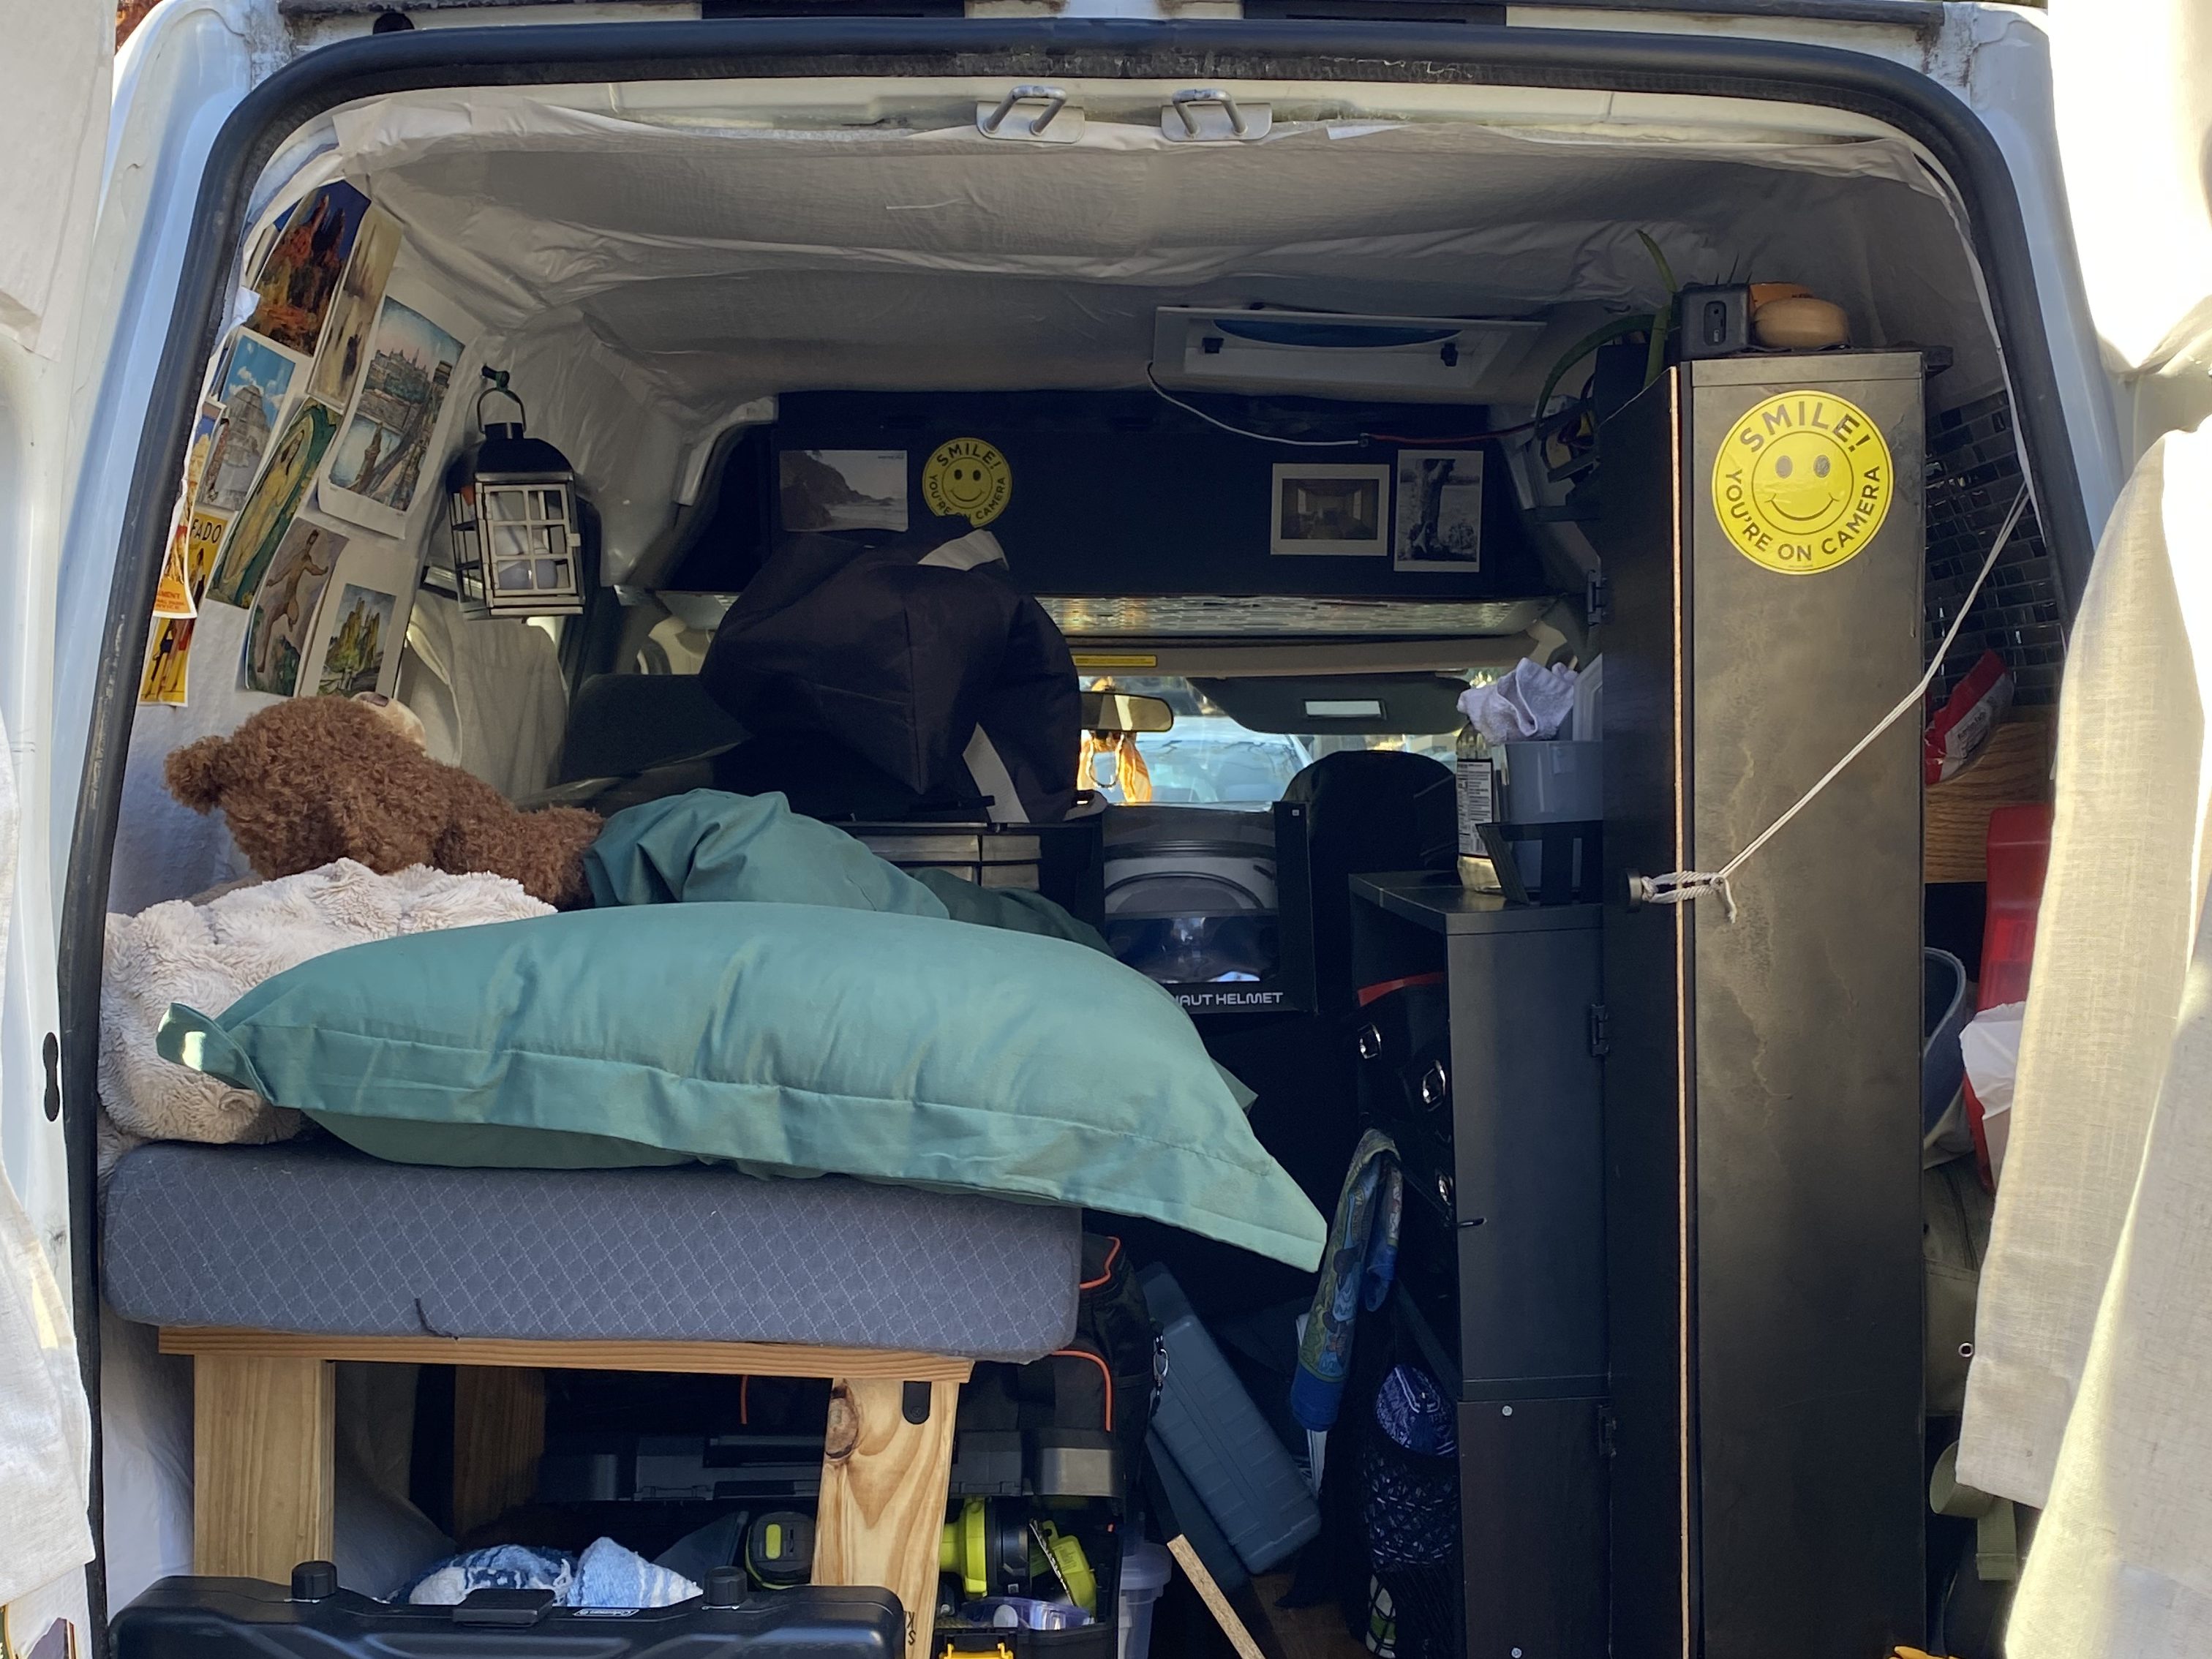
We purchased Walie in May 2022. I reassessed my build, which meant giving up a shower, toilet, plumbing and even simple indoor cooking. I could fit a bed, a counter, upper and lower storage and a few appliances. That was it.
Luckily, this first year I only planned a few large road trips around the West. I have a very crude toilet system and access to Anytime Fitness for showers. The wilder half of the U.S. also has much more free and cheap camping options, so I had plenty of room and ease to prepare food.
With this in mind, I started to turn my idea into a finished product.
It’s important to note that I had very little prior building experience before this. Actually, this was my first building project. Other than installing a Domestic Fan-Tastic Vent 2250 and taking out metal pieces (thank you Dad and Steve from Pak Mail), I did everything myself.
These are the facts, this is the story.
Building from the Blueprint
- Step 1: Insulation
I started the build by packing all of Walie’s crevices with insulation; the fireproof and less toxic kind. After, I added strips of sound deadening material to all hollow parts of the metal.,
The floor was leveled and covered with Extruded Polystyrene, or the Pink Panther boards you see in home improvement stores. The ceiling is a ceramic foam roll I plastered on with 3M Spray Adhesive. I will most likely have to redo this job because it is sagging a little.
After, I pasted SmartShield onto all surfaces for an extra layer of insulation. I cut pieces and covered them with white wallpaper to put on the windows at night and when I left the van. To level the floor, I used spare pieces of polystyrene board to fix the dips near the sliding doors.
This process took me about a month and a half to complete.

- Step 2: Floorboards and Wallpaper
For a cosmetic touch, I added planks of stick-and-peel wood flooring and white wallpaper with a faint wood print.
Over the leveled parts of the floor, I bought black door mats, cut them to shape and screwed them in. These provided a bit of cleanliness and a cheap alternative to a stick-and-peel flooring attempt. They also covered the parts where the wood floor ended and hid the lower level of insulation from view.
This process took me a few weeks to complete (around two).

- Upper Storage
This was probably the most difficult and most rewarding part of the whole experience. It was where I learned that you can actually, believe it or not, drill into a metal car.
But it took me a while to figure this out.
I grabbed a 2’x4′ sheet of wood from Home Depot with a chalk/whiteboard finish so I didn’t need to paint it black. I then made three sections with black wood I took off of old furniture pieces left on the side of the road.
Sometimes, cheap is scary. But hey, you asked how the sausage was made.
With a bit of netting, I made my three sections. During this build, I was scared of two things:
1) How the hell am I going to get this above my head in the van?
2) How the hell and I going to fit all of my clothes in this thing?
Believe it or not, I figured it out… sort of. I started by drilling a wood plank into the frame of the vehicle, which already had drill holes. I initially tried to fortify them with screw anchors, but once they fell, I quickly learned how to drill into the frame and got it in. From there, I used a bunch of brackets to keep the frame on the board that would hold my clothes. Finally, I threw a hastily made door on it with soft hinges.
While I had tested my clothes initially, I was so worried that nothing would fit. But by the grace of God, everything fit nice and snug. I celebrated with a relief nap.
This took me about two weeks to finish.

WARNING: This totals us at about two and a half months. I only had a little less than three to finish before my lease ended. The next and final section was done at such incredible speed that it may cause professional vanlifers, builders and dads alike to cringe and sweat. I apologize in advance.
- Step 3: Furnishings
After buying a camp stove, Jackery 500 and Kohree Electric Cooler (more details in Nom Nom article), I started to crank out my furniture. I started with the counter unit, which was a combination of the cheap coffee table I’ve had since college dorm era and a tv stand I found on the side of the road. I bolted those together and called it a day.
Next, I found an old CD bookshelf on the side of the road. I spray-painted it black and turned it into a micro van shelving system. I completed it with the quickest and most malformed door in existence (but it works, the knob secured with a hair tie!)
Finally, I made the bed. I had bought a camping mattress that folds into thirds and made the bed frame likewise. The frame was from an old couch on the side of the road that I wet-vacuumed and scrubbed, while the pegs were bought from Home Depot and cut to size. The bed itself folds at a third with the bed, which I accomplished by drilling two pieces of sheet wood into the zipped portion of the mattress and adding hinged legs.
All that I just listed was finished in a week. It was drilled into the van the night before I had to leave my apartment. The bed I had to redo because it didn’t initially fit in the van.
A few months later, I added a small retractable table to the right door for cooking.

Fitting my Possessions and Personals
For the past two years, I have been downsizing my things in increments. But it still wasn’t enough the night before I moved out. About half of my possessions were still donated to Goodwill. I crammed everything I had into Walie in the wee hours of the morning. By 8 a.m., it was finished.
Even more stressful, my roommate and I were going on a road trip to Colorado right after move out. We wanted to leave at 8 in the morning–I finished the van and moved out by 7:45 a.m.
It was fun. It was hard. It was stressful. I was asleep for the next two days. But I had done it. After almost three months, Walie was finished. I had built my first van.

Cosmetics/Decorations
I taped old postcards to the walls and cut up my posters to fit on the doors. My color scheme was green, white and wood; as you can clearly see the white and wood, the green was added with my comforter and a multi-shaded backsplash near the counter and on half of the upper storage.
I also added a black lantern holder to place my rechargeable lightbulb inside.
I still add to the design every now and then–style is an ongoing process.
Regrets/Rebuilds
With such little time to build and no time to test, there were bound to be problems. Here are my top regrets that I will eventually rebuild in the future:
- Ceramic Foam Roll on Ceiling
While this was smart in practice, the ceramic foam does not adhere well with 3M spray. It’s cottony in texture and comes apart with pressure. In this case, gravity. The back half of the roof is sagging and at some point, I don’t think the wallpaper will be able to hold it in place anymore.
- Leveling Floor – insulation board instead of wood
This was a quick and clumsy way of leveling. I was aching for a space where I could set up my small power saw and carve out wood pieces for a more permanent option. In the rebuild, I will take the time to cut these pieces or even make it shoe storage.
- Supports for cabinet and bookshelf – twine… yeah)
When I’m taking hard right turns, the counter/bookshelf unit sways under the pressure and threatens to come loose from its screws. To solve this, I used cheap twine and tied it several times on these thicker screws in the frame. Not a great idea.
It’s not the best idea to bolt them into the side due to the mobility of the car, so I will most likely just buy thicker rope to secure it.
- Not so Fan-Tastic Vent
This was more Dometic’s fault than mine. We received the Dometic Fan-Tastic Vent 2250 all intact. When we put it in with the help of a professional, still all intact. After a couple of days and a drive back home, the cheap plastic pieces that held the lever to the cover snapped.
For weeks, I was on a wild goose chase with Amazon, Dometic and the third party seller to get replacement parts for the faulty fan. In that time, a freak summer storm hit Madison and drenched my system. Thankfully my van suffered few damages, but the vent was completely fried.
I did get the replacement parts, but now I need a whole new motor system for it.
In Summary
That is my experience with converting my very own camper van. It’s the perfect road trip vehicle, and I hope somewhere down the line, my experience will help me build a vehicle that I can live and work in full-time.


Leave a comment